

Recently I had a project where I needed to display a room calendar in Power Apps. I explored a few ways of doing this, and in this post I’m going to show you how to do it using Power Apps, Power Automate, an Azure App Registration and the Graph API!
A bit of configuration before we start some dev…
So first we’re going to need to make sure we can access what we need to get the data we need. Now in my case, I had to produce a solution where my app could access any meeting room’s calendar, but this requires a nice amount of permissions in my tenant. So for the purposes of understanding this I’m going to assign myself full permissions to see room calendars, but you might want to assign yourself less permissions or you might not even be allowed full permissions to your tenants data for this.
Anyway, to get the permissions we’ll need to interact with the graph API here, we’ll need to create an app registration in Azure AD with the appropriate API permissions against it and a client secret to access it.
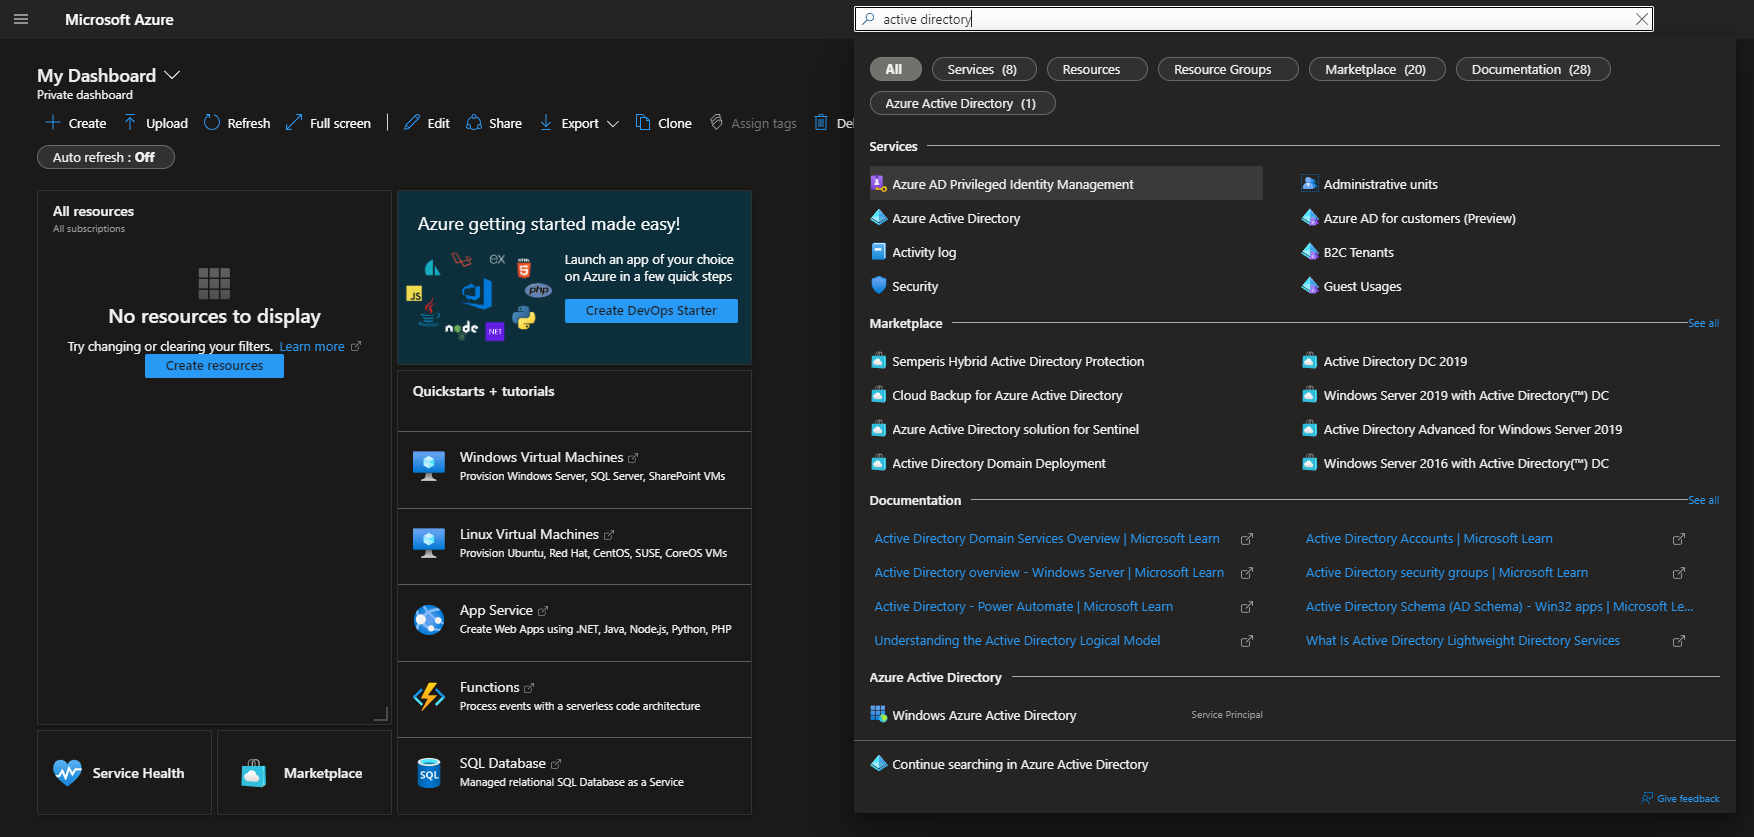
Head to portal.azure.com and authenticate with SSO. Search for and select Azure Active Directory.
Once you’re in your active directory, you’ll want to head to App registrations and select to create a new registration. From here we have a few things to fill in before we assign our app any permissions.
Give your app registration a name and then leave everything else as it is. Select register.
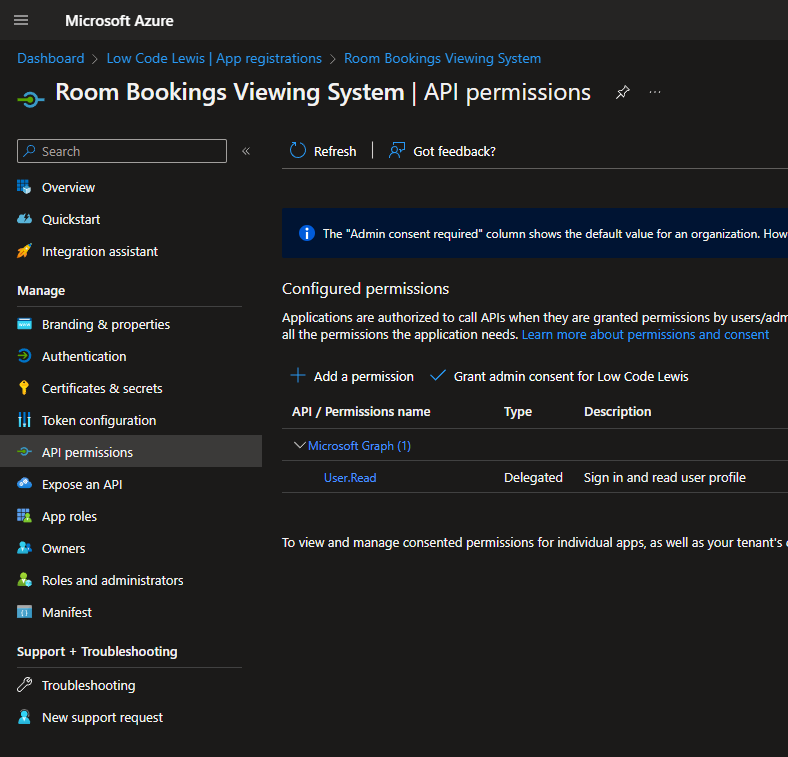
Here we need to give our app registration some relevant API permissions so it can get to the data that we want to retrieve.
We’ll be needing the following application permissions from Microsoft Graph to get the data we need:
Calendars.Read – This will let us read the mailbox calendars in our organisation.
Click ‘Add a permission’ and select Microsoft Graph under Microsoft APIs. Then select application permissions and search for the permission above. Then add this permission to your app registration.
We need Global Admin privileges in Azure AD to be able to do the next step:
From here you’ll need to grant admin consent against these permissions for your tenant. This is what we need global admin for. Select your permissions in your list and select ‘Grant admin consent for [org name]’.
Now… that’s your permissions added to your app, registered in Azure AD, but we need a way to access this app’s permissions and abilities from Power Automate.
Head over to ‘Certificates & secrets’ and select ‘new client secret’. Give it a description and set when you want it to expire. Hint hint, the default isn’t the highest because it’s supposed to be a level of security 😉
Take a quick note of your secret value before refreshing this page so that we can reference it in a moment.
You could store this in Azure Key Vault, but to keep things simple in this post, we’re just going to store it in an environment variable in a moment.
Creating the Power Platform solution
So, now we can start to do some development. Head over to make.powerapps.com and create a solution. I’m going to call mine ‘Meeting Room Bookings’.
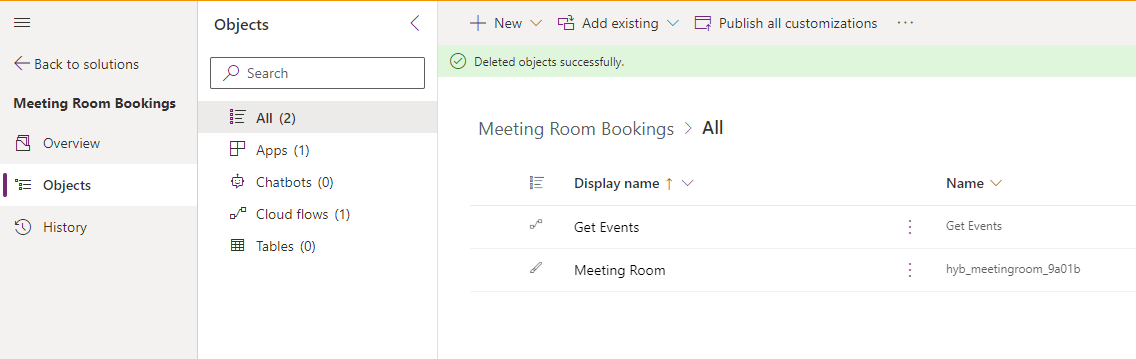
In my solution I’m going to start by creating a new Canvas App. Now I could start to build out my UI here, but I’d also like some data to work with really. I’m going to see if I can get myself some data to work with in my app now.
Now as a prerequisite, I’m going to let you know that we’ll be working with an input to this flow which will further be a parameter input to our app which will be our room id in Azure AD. This makes it possible to use this app against any meeting room by providing our app with our rooms ID in its URL. I found this handy for setting up kiosk devices, using the room ID in the link for the kiosk.
Creating the flow
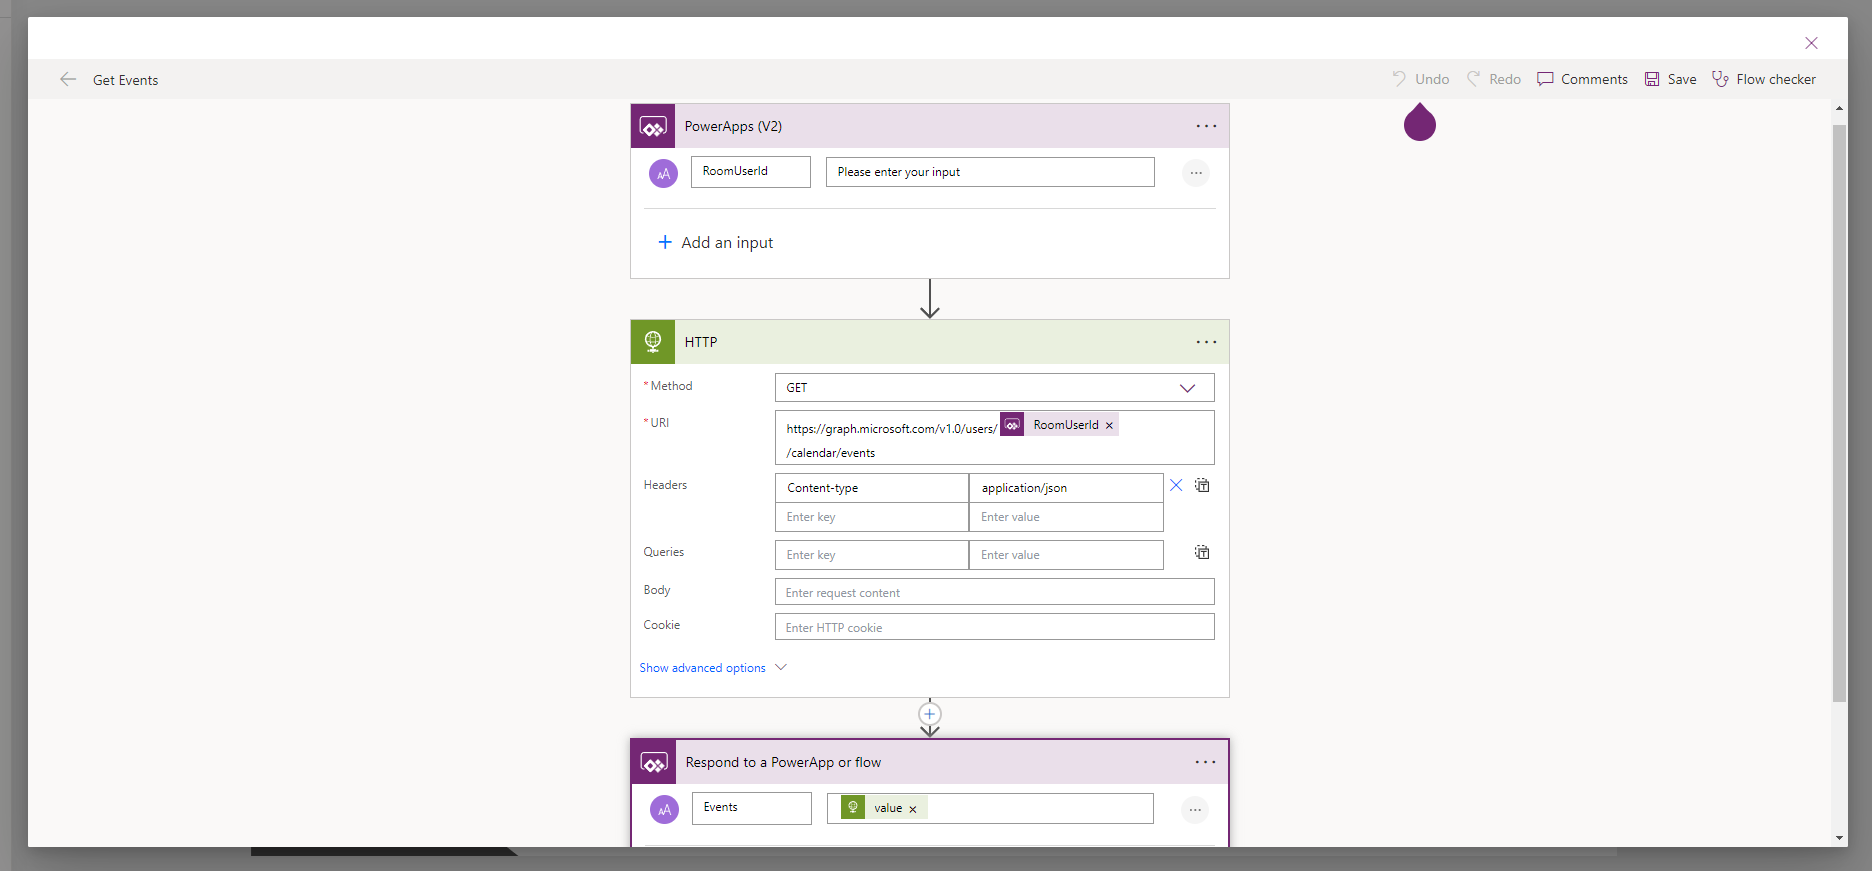
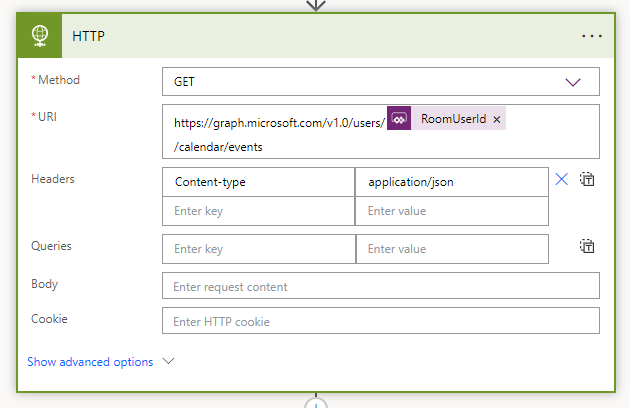
Here in my flow, I’ve started with the PowerApps (V2) trigger to be able to control my inputs before I reference them in my flow. I’ve created a text input for my rooms ID called ‘RoomUserId’. Then I’ve got a HTTP call step which is using the GET method to retrieve the data I want to work with, and finally I’m responding back to my app with the outputs of my HTTP call using an output called ‘Events’.
The HTTP step
So this part might be slightly more tricky, but I’m here to help… and in fact it’s SUPER easy…
There’s multiple different methods of API call we can use. In this case we’re going to use GET which will retrieve data from the API.
Then for our request URL we’re going to use the following:
https://graph.microsoft.com/v1.0/users/USERID/calendar/events
In the above, you’ll want to replace USERID with a user ID from Azure AD to read that calendar. In my case, I want to be able to pass a parameter into my app when I run a device in kiosk mode so I’ll construct my kiosk link to have my user id on the end, then I’ll use an input in my flow to further pass that ID which will get stored in a variable in my app, into my flow. You could reference this in an environment variable if you don’t have a need for this app to be able to view multiple different calendars based on who has opened it / it’s link / the parameter values passed in.
You’ll want to add the following in your request headers
Key: Content-type
Value: application/json
Authentication Fun!
So now we’ve filled out the step with what we want to request, but now we need to provide the permissions and an app to use to get to the data we’re requesting. Open up the advanced options of the HTTP request step, and select Active Directory OAuth for the Authentication option.
The Authority should be set to https://login.microsoft.com
For the tenant, you can copy the tenant ID from your app registration overview which will be titled “Directory (tenant) ID”. You could put this into an environment variable if you’re bound to use it multiple times.
You can then set the audience to https://graph.microsoft.com
Set the Client ID to the value in the overview page of your app registration next to Application (client) ID, so that your step knows which registration we’re using.
Then we can authenticate against our app registration using the Secret credential type. Here paste in your secret value that we took a note of earlier. Again, we could use Azure Key Vault here to make things more secure, but I’ll cover that in another post, and for now we can just hard code the value or stick it into an environment variable for learning purposes 🙂 … I’m not however saying that this method is best practice at all 😉
Respond to our app with some content
Now create your output in your respond to a PowerApp or flow step (Microsoft should really rename that step to match the Power Apps branding… I also spot an old Power Apps logo…), and give it a name of your choice. Then add the content which you can use an expression for to get to the values returned in the JSON output:
body('HTTP')['value']
Building out my app!
So the first thing we need to do is create the functionality in our app to pass a parameter value in and our app handle that value. So in my App OnStart property, I’m adding the following expression so that if my app receives a parameter value for roomId which isn’t blank, it will set a global variable with the value of that parameter. If my app can’t find a room id that’s been added to my URL, then it will notify the user that a room id wasn’t provided.
If(Not(IsBlank(Param("roomId"))),Set(gblRoom,Param("roomId")),Notify("No room id provided",Information));
So now I have the value of my roomId stored in a variable I can pass this into my flow as an input for it to use in my HTTP request, for it to then pass back my calendar entries for that room. I’m going to add the following formula right after my first line in my OnStart to run my flow and store my events JSON in a table within a global variable.
Set(gblEvents,Table(ParseJSON(GetEvents.Run(gblRoom).events)));
Here I’m using the ParseJSON function to parse a JSON string and return an untyped object representing my JSON structure. The slight struggle here is that whilst Power Apps knows I’ve got an untyped object which is my JSON output it doesn’t know any of the data types I’ve returned in my JSON output. For example, it can’t tell whether one field in my record is a boolean or a string. So, the next step is to convert my untyped object data type into the data type I need to then display it in my app.
Creating a gallery
Next I’m going to create a gallery with the following properties:
Template Size: 275, Wrap Count: 1, Template padding: 0, Fill: Transparent, Border: 0, Items: gblEvents
I’m going to add a HTML control and use the entire space of my template. In fact you might even need to increase the template size, add your HTML, and then reduce the template size over the HTML control to bring the cards closer together without cutting off any HTML. I’m using the following div container with box shadow to create a nice card in my app:
"<div style='margin:25px; background: rgb(77,77,77,225); width:550px; height:200px; border-radius:15px; box-shadow: rgba(50, 50, 93, 0.25) 0px 13px 27px -5px, rgba(0, 0, 0, 0.3) 0px 8px 16px -8px; '> </div>"
Now I’ve got a nice card I can add some labels to put my data into. I’m going to add a first label and use the following syntax in the Text property to get to the subject of my calendar entry. Now because we’re working with an untyped object and we need to convert the data type, I’m going to use the Text() function to convert my value to a string here. You should also note that Power Apps can’t get a preview of the data in the untyped object returned so intellisense won’t suggest any field names. You can find these in the outputs of a flow run.
Text(ThisItem.Value.subject)
This is now returning the subjects of my calendar entries / meetings! Cool! So I’ve got my data, now I just need to populate my card with the rest of the info I want to display. You can do this using any of the fields returned in your JSON and the appropriate data type conversion outlined here:
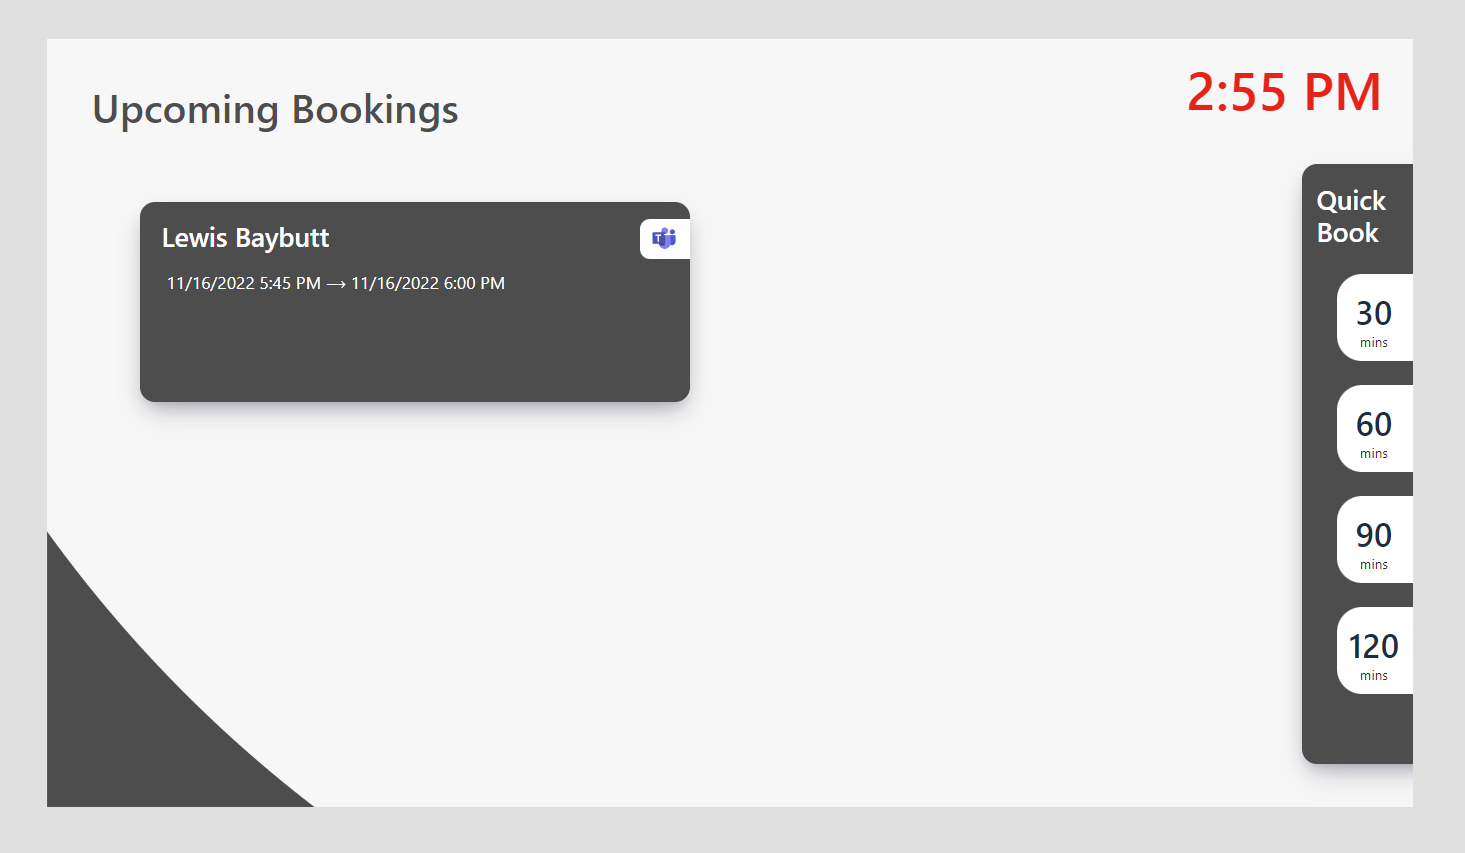
Here’s the very basic UI I’ve started to put together for my application. You can see that I’ve added my subject field (yes I called my meeting after me 🙂 ), and I’ve added the from and to time’s for my booking. I’ve also identified whether my meeting has Teams enabled or not, and I’m using the visible property of my Teams icon and white background there to display this when my meeting is enabled for Teams.
If you’re wondering how I converted my data types for my from and to times, this is using the DateTimeValue() function. I’ve also used a UNICODE character here to add the arrow. You can copy this: ⟶
Launching the app with a room Id
So where do we find the id we need to use to pass into our app URL as a parameter? Find the room you want to use as a user in portal.azure.com under Azure Active Directory users. Then copy the ‘Object ID’ from the overview page of the user. Now once you’ve published your app, open it and add the following to the end of the URL:
&roomId=[yourRoomObjectId]
Replace [yourRoomObjectId] with the Id you copied from the room you found as a user in AAD.
You’ll notice that the first time you open your app without that added room Id in the URL, things don’t work too well, but once you add that Id in watch your events appear!
And there you have it! That’s how you use the Graph API and Power Platform to create an app displaying a room calendars bookings in Power Apps. This method best works with tablet devices set up as Windows kiosks where the URL is specified in setup and is always launched when powering on the device. You’d add the URL with the appropriate room Id passed in as a parameter and then use this device outside its appropriate meeting room for example!
You could also go further with flows that handle POST requests to do quick bookings like I’ve added on the right in my app above!
I hope you liked this start to a room bookings overview app that would sit outside of a meeting room! If you’ve got any questions or need some help with this, let me know in the comments below or get in touch with me directly! 🙂